Have you ever taken a stunning photo only to be slightly disappointed by the color? Maybe the sky looks a bit washed out, or the flowers lack that vibrant pop they had in real life. Don’t worry! Photoshop can be your secret weapon for transforming colors and unleashing the full artistic potential of your images. This comprehensive guide will walk you through the ins and outs of changing colors in Photoshop, making you a master at enhancing your photos and unlocking your creative vision.

Image: phlearn.com
Imagine you’re a painter standing before a canvas, armed with a palette of endless colors. Photoshop offers the same freedom and control over your images. Whether you want to subtly adjust a single color or completely overhaul the color scheme, Photoshop empowers you to create stunning visuals, just like an artist with their brushstrokes.
The Magic of Color: A Photoshop Crash Course
Before diving into the specific techniques, let’s understand the fundamental principles of color manipulation in Photoshop.
RGB: The Building Blocks of Color
Photoshop primarily uses the RGB color model, which stands for Red, Green, and Blue. These three primary colors combine to create every color imaginable on your computer screen. Just like mixing paint, adjusting the levels of red, green, and blue allows you to create different shades and hues.
Layers: Maintaining Control
Photoshop works wonders with layering. This means you can create multiple versions of your image, each with its own adjustments, without affecting the original. It’s like having a painter’s transparent sheets stacked on top of each other, allowing you to manipulate elements without ruining the underlying work.
Adjustment Layers: Non-Destructive Edits
Adjustment layers are like magic filters in Photoshop. They allow you to apply color changes without directly altering your original image. Think of it as using a transparent overlay that affects the color underneath. This way, you can easily adjust or remove the color change later, providing flexibility and control throughout your editing process.
Unlocking Photoshop’s Color-Changing Power
Now, let’s delve into the various ways Photoshop lets you modify colors:
1. Hue/Saturation Adjustment Layer: The “Hue/Saturation” layer is your one-stop shop for basic color adjustments. It allows you to tweak the following:
- Hue: Adjusts the actual color of the image. Imagine shifting the rainbow to change the dominant color.
- Saturation: Determines the intensity or “richness” of a color. This controls how vivid or muted your colors appear.
- Lightness: Modifies the brightness of a color.
2. Color Balance Adjustment Layer: When you need more precise control over specific color ranges, the “Color Balance” layer comes in handy. This tool lets you adjust the balance of red, green, and blue tones in your image, allowing you to warm up, cool down, or create specific color moods.
3. Selective Color Adjustment Layer: For fine-grained adjustments, leverage the “Selective Color” layer. It lets you focus on specific colors within your image, like reds, yellows, or cyans, and then fine-tune their individual properties like “lightness” or “magenta.”
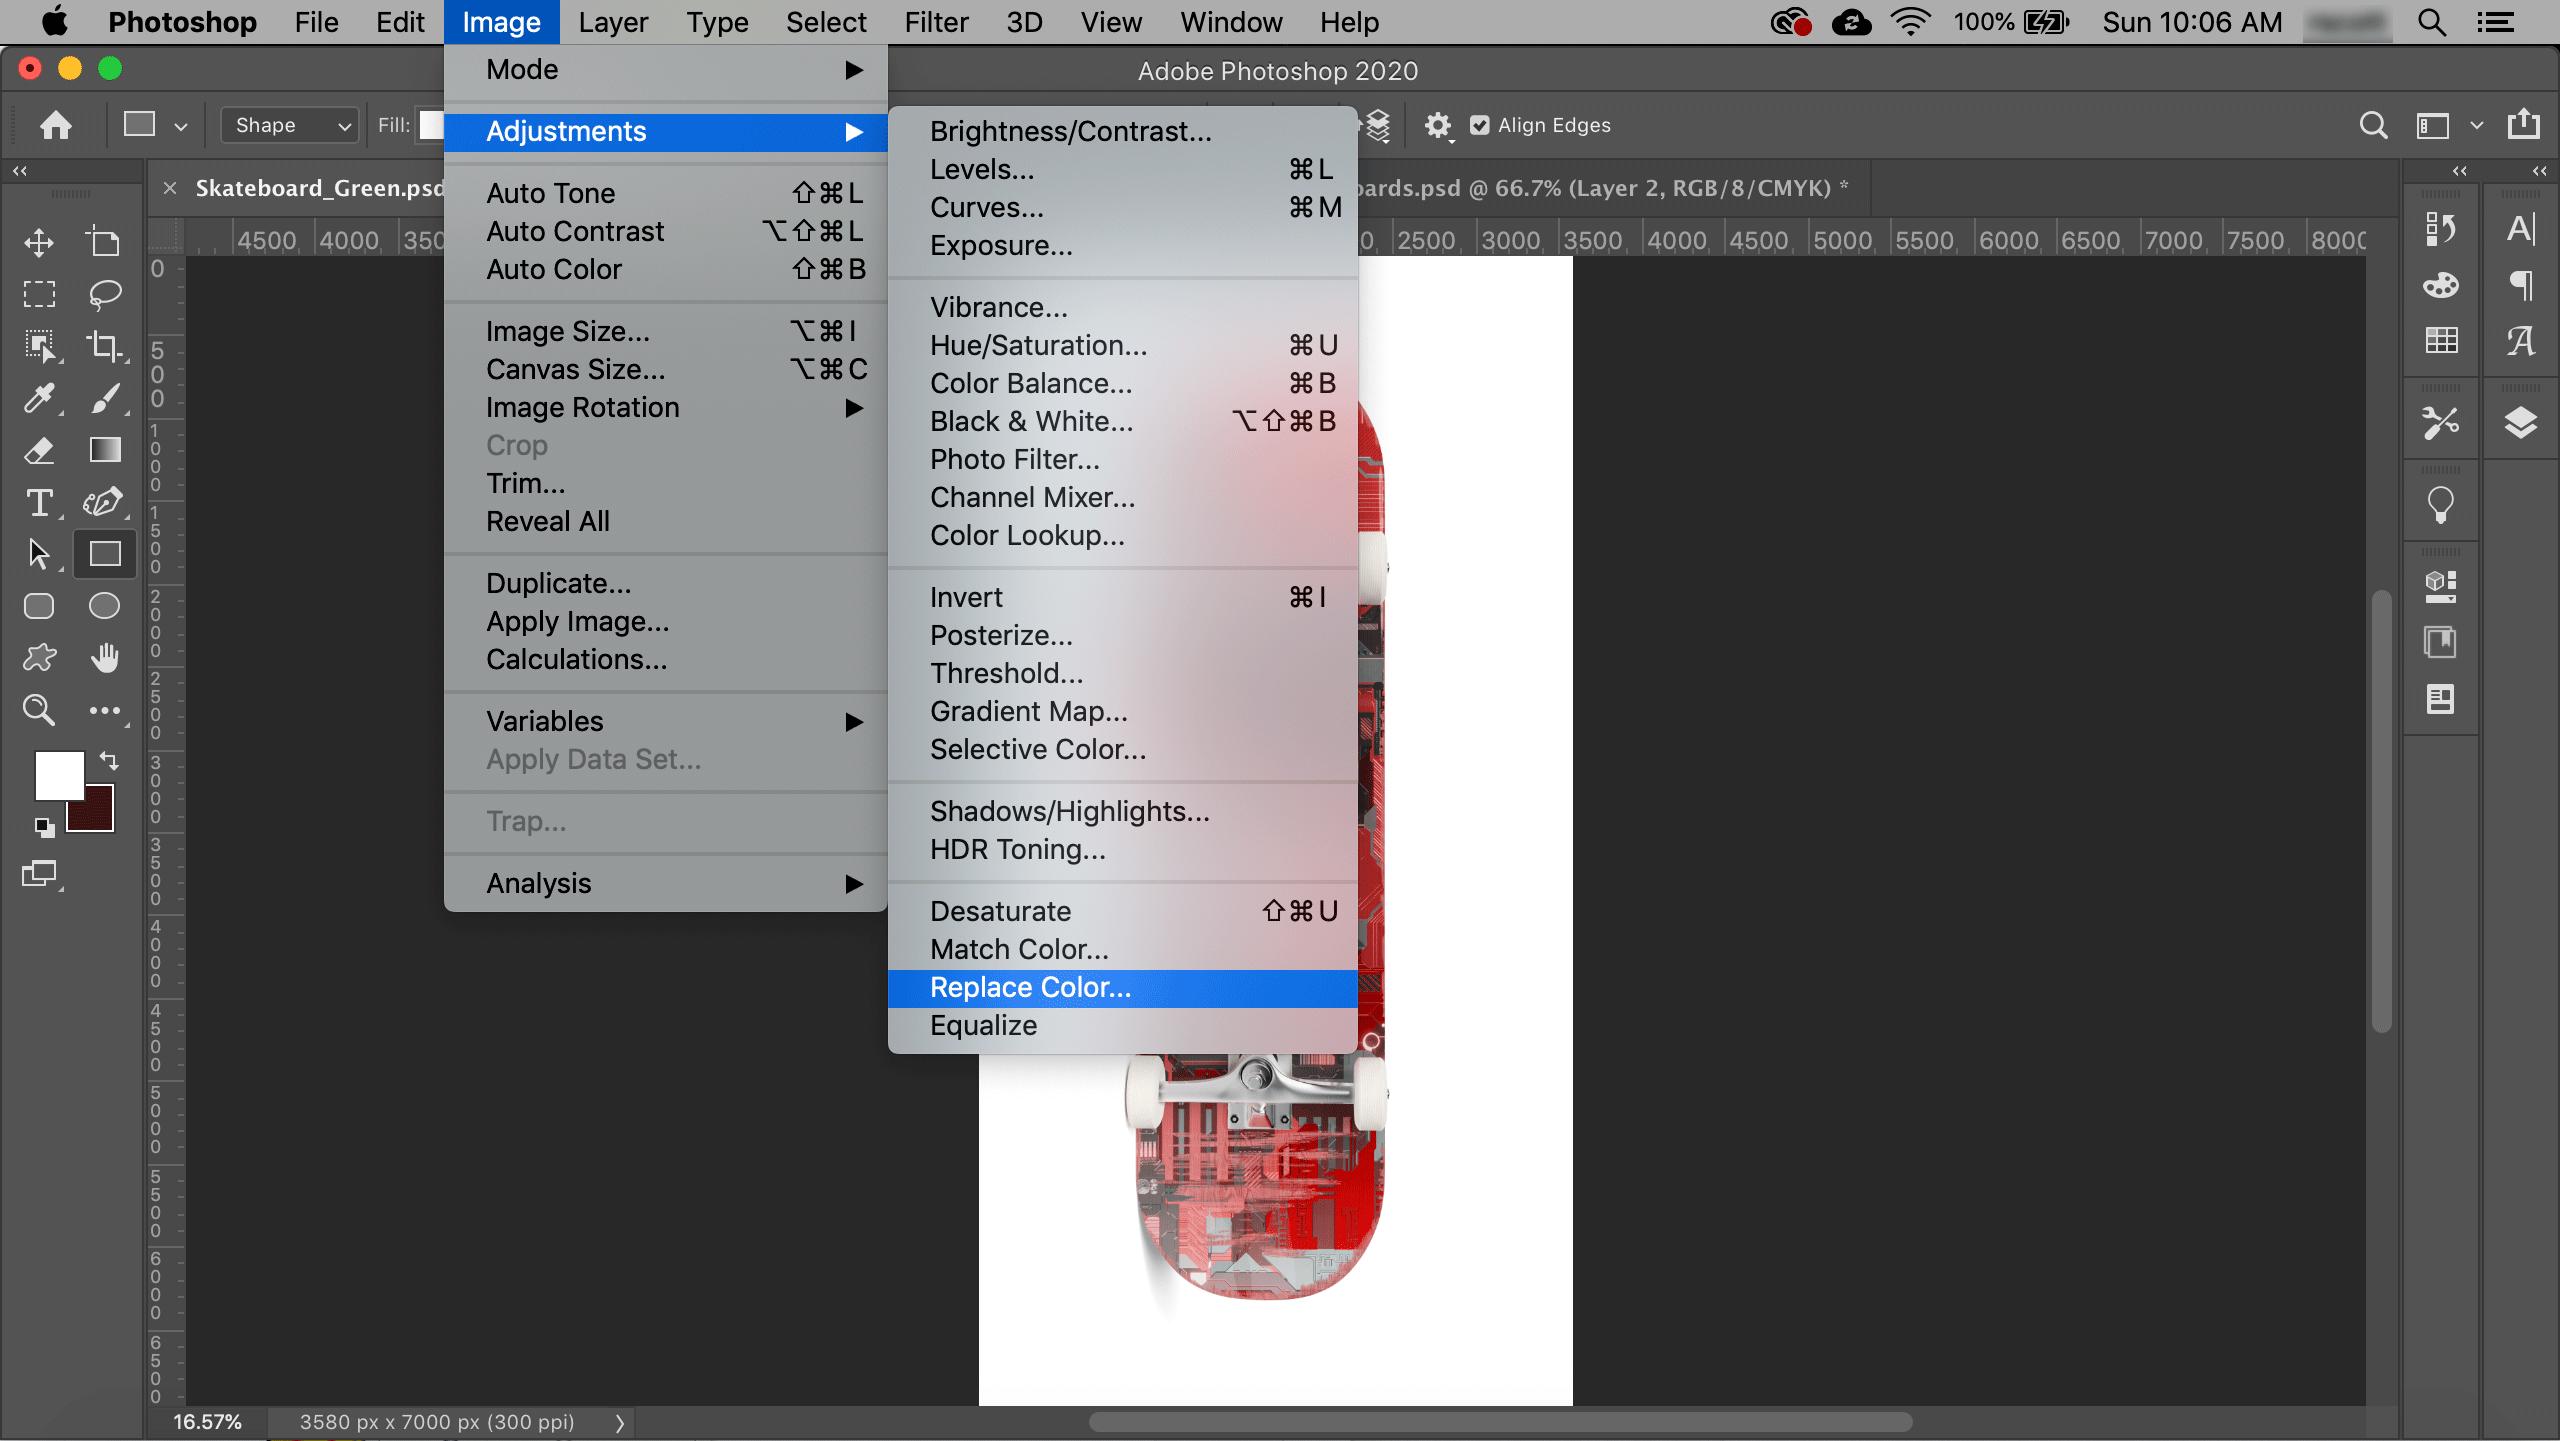
4. Replace Color: The “Replace Color” option is a powerful tool for targeted color changes. It allows you to select a specific color range in your image and replace it with a new color. This is incredibly useful for quickly swapping the color of a shirt, for example, without affecting the surrounding areas.
5. Color Lookup Adjustment Layer: Experiment with different color palettes and artistic effects using the “Color Lookup” layer. It applies predetermined “look-up tables,” essentially color mapping techniques that can transform the colors in your image. This layer is perfect for adding vintage filters, cinematic effects, or enhancing artistic styles.
6. Gradient Map Adjustment Layer: To create stunning and unique color transitions, utilize the “Gradient Map” layer. It allows you to apply a gradient (a smooth blend of two or more colors), effectively mapping the brightness values of your image to the corresponding colors in your gradient. This tool is a favorite for creating color-graded images with smooth, artistic transitions.
7. Channel Mixer Adjustment Layer: For advanced users who want in-depth control, the “Channel Mixer” layer offers the most versatility. It lets you manipulate the individual red, green, and blue color channels, allowing you to blend them, create artistic effects, or even convert your image to black and white.
The Power of Color Correction: Expert Insights
While Photoshop offers a plethora of options, the real magic lies in understanding how to use them creatively. Here’s what experts recommend:
- Start with a Non-Destructive Approach: Always use adjustment layers to maintain flexibility, enabling you to experiment without permanently altering your original image.
- Less is More: It’s tempting to go overboard, but often subtle color adjustments can make a world of difference. Start with minor tweaks and progressively increase the intensity if needed.
- Think about Mood and Tone: Consider the message you want to convey through your color choices. Warm colors evoke comfort and happiness, while cool colors can create a sense of calm or coolness.
- Use Reference Images: If you’re struggling to achieve a particular color look, browse online for reference images. Analyze their color palettes and try to replicate them in your own image.

Image: planetphotoshop.com
How To Change A Color In Photoshop
Conclusion: Embracing the Colors of Creativity
Changing colors in Photoshop is an essential skill for anyone who wants to elevate their photography, graphic design, or artistic projects. With the right tools and techniques, you can transform dull images into vibrant masterpieces. Don’t be afraid to experiment! Let your creativity lead the way as you explore the countless possibilities Photoshop offers for color manipulation. Start your journey today and unlock the full potential of your artistic vision.


