
Have you ever stared at a vibrant yarn skein, longing to weave its color into your crochet project? Perhaps you’ve dreamt of creating a striped scarf, a blooming granny square, or a rainbow amigurumi. Adding new colors in crochet unlocks a whole new world of creative possibilities, transforming simple stitches into captivating works of art. But the act of introducing a new color can feel daunting, especially for beginners. Fear not! We’re about to delve into the fascinating world of color changes in crochet, demystifying the process and empowering you to confidently create your own colorful masterpieces.

Image: www.pinterest.com
Color changes, when executed flawlessly, create a seamless transition between hues, enhancing the visual appeal of your projects. Whether you’re a seasoned crocheter or just starting out, understanding how to add new colors smoothly is an essential skill. It’s the key to crafting intricate patterns, adding subtle gradients, or simply infusing your work with a burst of color. This article will guide you through the different techniques, helping you understand each method and choose the best one for your next creation.
The Foundation: Understanding the Basics
Before diving into specific techniques, let’s lay the groundwork. The most common way to change colors is through a process known as “carrying the yarn.” This simply means bringing your unused color along with your working yarn, ensuring a smooth transition. This approach not only prevents messy knots from appearing on the right side of your work but also minimizes tension changes, ensuring a visually pleasing finish. Let’s break down the general steps involved in carrying the yarn:
-
Finishing the Last Stitch: With your current color, complete your final stitch as usual, leaving a small tail of yarn. This tail will be useful later during the color-change process.
-
Introducing the New Color: Hold the new yarn in your hand, bringing it behind your working loop on the hook. Now, wrap the new yarn around your hook, just as you would with any stitch.
-
Securing the New Yarn: Pull the new yarn through the loop on your hook, creating the first stitch with your new color.
-
Tying Off the Old Yarn: To secure the old yarn, use your hook to gently pull the small tail through the loop created by the new yarn. Keep the tail taut to avoid unraveling. This forms a secure knot on the wrong side of your work, effectively hiding it from view.
Unlocking the Techniques: Explore the Possibilities
Now that we’ve established the foundation, let’s explore the different techniques you can use to seamlessly integrate color changes, each tailored for specific purposes and creating distinct visual effects:
1. The Basic Color Change
This method provides a simple and straightforward transition between colors. It is most suitable for larger projects when you want to minimize the prominence of color changes. To achieve this technique, simply follow the steps outlined in the “Understanding the Basics” section. The basic color change is a great starting point for learning color changes and is often used when introducing stripes or creating gradients in larger projects.
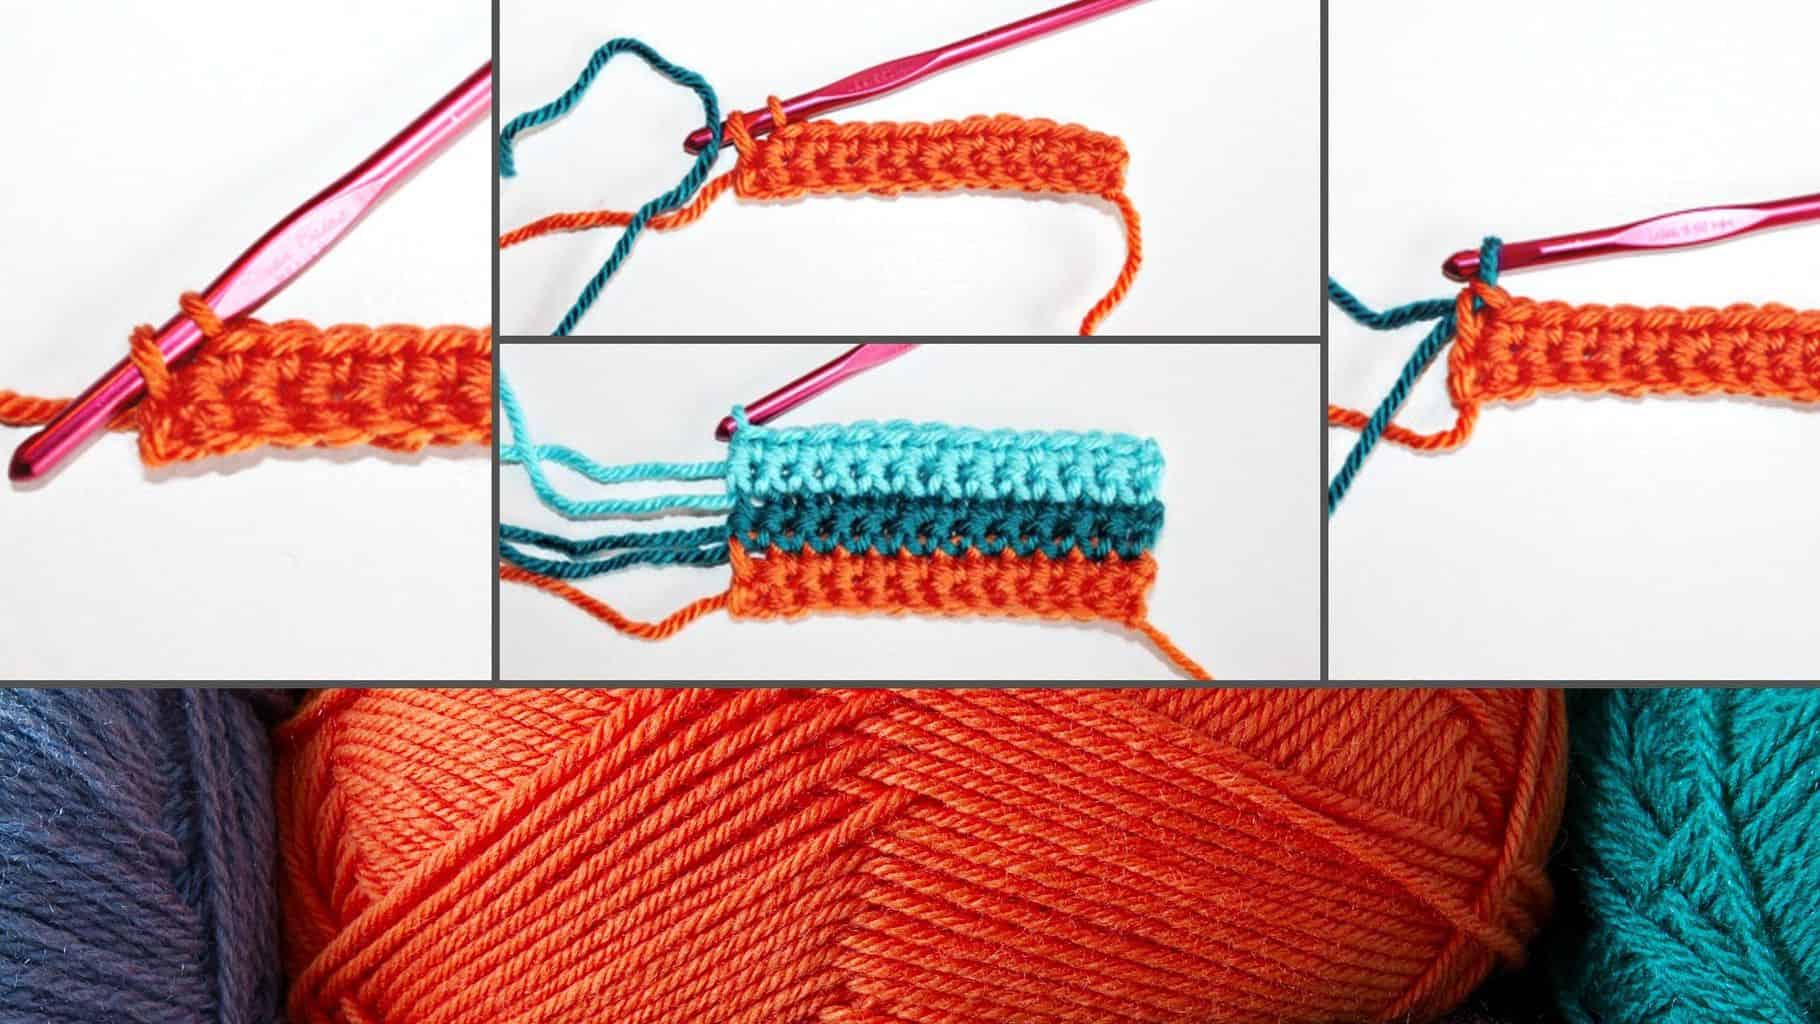
Image: easycrochet.com
2. The Single Crochet Color Change
This technique is ideal for creating visual interest and can be used for various patterns, including stripes, mosaics, and intricate designs. It creates a more defined color change, providing a clear visual distinction between colors, especially noticeable in small projects or projects with intricate patterns.
Here’s how to execute the single crochet color change:
- Complete your final single crochet stitch with the old color, leaving a short tail.
- Bring the new yarn behind your working loop on the hook.
- Wrap the new yarn around your hook, just as you would for a single crochet stitch.
- Pull the new yarn through the loop on your hook, creating the first stitch with your new color.
- Using your hook, pull the tail of the old yarn through the stitch just created (the first stitch of your new color), creating a small, secure knot on the wrong side of your work.
This technique creates a tighter, more defined color change, offering better control over the visual transition between colors.
3. The Slip Stitch Color Change
The slip stitch color change, as the name suggests, involves utilizing a slip stitch to transition between colors. This method allows for a smooth and almost invisible color change, making it perfect for creating fine gradients, intarsia, or when you desire a minimal visual disturbance. Here’s how to execute this technique:
- Complete your final stitch with the old color.
- Bring the new yarn behind your working loop on the hook.
- Wrap the new yarn around your hook as if you were performing a single crochet stitch.
- Pull the new yarn through the loop on your hook, effectively making a slip stitch with the new color.
- Pull the tail of the old yarn through the slip stitch just created to secure it.
This technique creates a barely noticeable color change, making it perfect for seamless gradients and intricate designs where a gradual transition is desired.
4. The Double Crochet Color Change
This technique is very similar to the single crochet color change but is used specifically for double crochet stitches. Here’s how to perform it:
- Complete your final double crochet stitch with the old color, leaving a short tail.
- Bring the new yarn behind your working loop on the hook.
- Wrap the new yarn around the hook as you would for a double crochet stitch.
- Pull the new yarn through the loop on the hook, pulling it through both loops on your hook.
- Use your hook to pull the tail of the old yarn through the loop created by your new double crochet stitch, securing it on the wrong side of your work.
Beyond the Basics: Exploring Advanced Techniques
Mastering the basic techniques unlocks a world of possibilities. However, you can elevate your color-changing skills by exploring advanced methods designed to create specific visual effects:
5. The Intarsia Technique
Intarsia is a technique commonly used in crochet and knitting to create images and intricate patterns using multiple colors. It involves carrying yarn along the back of your work, switching colors only when needed. This meticulous technique requires great attention to detail, creating a stunning visual impact. In intarsia, you work with separate strands of yarn, changing colors only when your pattern dictates it. Each color is treated as an independent strand, carrying it across the back of your work until needed again.
6. The Tapestry Crochet Technique
Tapestry crochet is similar to intarsia but allows for more flexibility in color placement and introduces a new dimension of texture. It is an intricate technique that uses “floats” to change colors, leading to a beautifully textured finish, particularly when used in projects like blankets or wall hangings. These “floats” are strands of yarn carried across the back of the work, creating a raised texture on the right side, enhancing the visual impact of your project.
How To Add A New Color In Crochet
https://youtube.com/watch?v=i-5d6kBqtvg
Mastering Color Changes – A Journey of Exploration
Learning to successfully integrate colors into your crochet projects empowers you to create endless possibilities. From simple stripes to intricate tapestries, the techniques outlined above equip you with the skills to transform a blank canvas of yarn into a masterpiece of color. Experiment, explore, and don’t shy away from making mistakes. The journey of mastering color changes is a process of discovery, fueled by experimentation and creative exploration. Each stitch you create, each new color you introduce, is a testament to your evolving crochet journey.
Key Takeaways:
- Seamless color changes add a touch of magic to your crocheted creations, enriching the overall aesthetic.
- Choosing the right technique for your project is key to achieving the desired visual effect.
- Experimentation is crucial! The more you practice, the more proficient you’ll become in executing flawless color changes.
Call to Action:
Pick up your crochet hooks and yarn, choose a colorful project, and embark on your own journey of exploration. Embrace the magic of color changes, and let your creativity flow! Share your experiences in the comments section below, and let us know how you’re incorporating new colors into your crochet projects.


