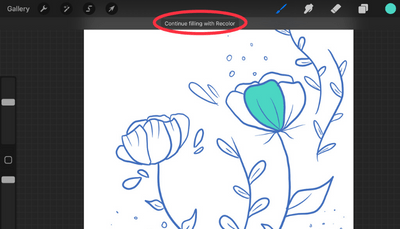
Have you ever felt frustrated by your digital coloring skills? You’ve got the perfect image in your mind, but every time you try to bring it to life in Procreate, the colors bleed beyond the lines. The result is a messy, amateur-looking piece that doesn’t do justice to your artistic vision. You yearn for that clean, crisp look you see in professional artwork, but it feels out of reach.

Image: adventureswithart.com
Don’t despair! Mastering the art of coloring within the lines in Procreate is a journey, and with the right tools and techniques, it’s a journey you can conquer. This guide will walk you through the essential steps, sharing valuable tips and tricks to help you achieve those polished, professional results.
Setting the Stage: The Foundation of Successful Coloring
Before diving into the techniques, let’s lay a solid foundation. The key to flawless coloring in Procreate starts with the initial sketch. This isn’t about being a master artist; it’s about creating clean and clear lines that your colors can comfortably follow.
1. Embrace the Power of Layers:
Procreate is a digital wonderland where layers become your best friend. Create a separate layer for your line art. This allows for flexibility later on, letting you make adjustments to your lines without affecting the coloring layer. If you happen to make a mistake, simply create a new layer and redraw the offending line instead of erasing it, keeping your original line work intact.
2. Choose Your Weapon Wisely:
Don’t underestimate the power of the right tool! Select a brush with a crisp, defined tip. The “Studio Pen” is a great go-to for smooth, clean lines. Experiment with different brushes until you find one that suits your style and precision.

Image: www.colorsidea.com
3. Embrace the Importance of Clean Lines:
A thin, crisp line is your best friend! It creates a clear barrier for your colors. Avoid thick, messy lines, as they can lead to unwanted color bleeding. Use a light touch and take your time to refine the linework for a precise and delicate touch.
The Coloring Commandments: Avoiding the Line-Crossing Sins
You’ve laid down your perfect line art, and now it’s time to unleash the color. But before you dive in headfirst, remember these commandments to ensure your colors stay within their designated areas.
1. The Art of Patience:
Rushing leads to mistakes. Take your time to carefully color within the lines. You can always adjust the color later, but trying to fix out-of-bounds colors is much more challenging.
2. The Magic of Zooming:
Details are your friends. Zoom in on the areas where precision is crucial, like small details or intricate patterns. The closer you can see, the less likely you are to accidentally go over the lines.
3. Embrace the Power of Pressure Sensitivity:
Use your Apple Pencil with a light touch, especially near the edges of your lines. Apply more pressure only where you need darker shades or heavier lines.
4. Don’t be Afraid to Underpaint:
Underpainting is a great way to create smooth transitions between colors. This involves laying down a light layer of color first, then building on top of it with more saturated colors. The underpainting acts as a foundation, creating a smoother flow of color without the risk of bleeding.
5. The “Overpaint” Technique:
If you do happen to cross a line, don’t panic! The “Overpaint” technique is your savior. Use the “Color” tool and carefully fill in the area with the color of the adjacent section. Then, use your finger or the “Smudge” tool to blend the overpainted area into the neighboring color. This technique is especially useful for small mistakes or when you need to subtly blend colors.
Pro Tips: Mastering the Art of Digital Coloring
Now that you know the basics, let’s delve deeper into some advanced techniques to elevate your coloring to the next level.
Mastering the Color Picker:
The “Color Picker” is your trusty sidekick. It allows you to sample existing colors within your artwork, ensuring a cohesive and harmonious color palette.
1. Embrace Sampling:
Selecting colors from your existing artwork helps to create a cohesive and harmonious look. Avoid using random colors that clash with your overall vision.
2. Use the Eyedropper Tool for Precision:
The “Eyedropper” tool lets you select a color from a specific point within your artwork. This is particularly useful for picking up the exact color you need to create a smooth transition between two areas.
3. Experiment with Color Harmonies:
If you want to take your coloring game to the next level, explore color theory! Learn about color harmonies like complementary, analogous, and triadic colors. These color relationships can create depth, balance, and visual intrigue within your artwork.
4. Harness the Power of Blend Modes:
Procreate offers a range of blend modes that can help you achieve unique color effects. Experiment with options like “Multiply,” “Screen,” and “Overlay” to create depth, luminosity, and interesting color interactions.
How To Color Without Going Over Lines Procreate
The Journey Continues:
Learning to color in Procreate without going over the lines is an ongoing process. It’s about practice, patience, and experimentation. Don’t be discouraged by mistakes; they are stepping stones to mastery. As you delve deeper into Procreate’s features and techniques, you’ll discover endless possibilities for bringing your artistic visions to life.
Embrace the journey!
Remember, the beauty of digital art is that it is a forgiving medium; you can always undo and retry. So go ahead, explore Procreate’s colorful world, experiment with different techniques, and transform your artistic visions into reality. Happy coloring!


