Have you ever looked down at your beautiful hardwood floors and noticed a new scratch marring their perfection? It can be disheartening to see something so unsightly mar your home’s aesthetic. You might think, “There’s no way to fix this! My floor is ruined!” But fear not, fellow homeowner! Removing scratches from wood floors is easier than you might think. With a little effort and the right tools, you can restore your floor to its former glory.

Image: www.mikeshardwoodfloorservice.com
This comprehensive guide will equip you with the knowledge and techniques to tackle those pesky scratches, regardless of their severity. We’ll delve into different methods for various scratch types, explore preventative measures, and empower you to regain the pride and joy you feel when you look at your beautiful wood floors. So let’s get started!
Understanding Wood Floor Scratches
Scratches on wood floors are caused by everyday wear and tear. From furniture being dragged across the floor to pet claws, these scratches can range from barely visible to quite deep and noticeable. The severity of the scratch will dictate the repair method necessary.
Essential Tools for Scratch Removal
Before we delve into specific repair techniques, let’s gather the tools you’ll need:
- Soft Cloth: Essential for applying and removing various cleaning solutions and polishing agents.
- Fine-Grit Sandpaper: Helps to remove superficial scratches by gently sanding the affected area. Options include 150, 220, and 400-grit for different levels of abrasion.
- Wood Filler: A paste-like material used to fill in deeper scratches and create a smooth surface.
- Wood Stain (Optional): To match the color of the filler to the surrounding wood for a truly seamless repair.
- Wood Finish: Used to seal and protect the repaired area, restoring its natural shine.
- Safety Glasses and Dust Mask: These are crucial for protecting your eyes and lungs from dust generated during sanding.
Simple Solutions for Shallow Scratches
For shallow scratches that haven’t penetrated the wood’s finish, a few simple solutions can work wonders:
- Household cleaners: A mixture of equal parts white vinegar and water can often conceal minor scratches. Apply the solution with a soft cloth and allow it to dry completely.
- Olive oil: Apply a small amount of olive oil to a soft cloth and gently rub it into the scratch. The oil will fill the groove and make it less noticeable.
- Furniture polish: A good quality furniture polish can also help to mask scratches and restore shine to the floor. Apply a small amount to a cloth and rub it into the scratched area.

Image: www.dummies.com
Tackling Deeper Scratches
For scratches that have penetrated the wood’s finish, you’ll need a slightly more involved approach:
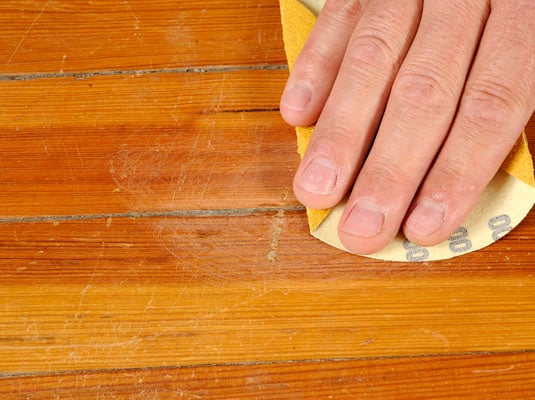
- Sanding: First, use fine-grit sandpaper to gently sand the scratch in the direction of the wood grain. This will level out the surface and remove the damaged layer. Gradually progress to a finer grit to smooth the area further.
- Wood filler: For deeper scratches, use a wood filler that matches the color of your floor. Apply the filler to the scratch, ensuring it’s level with the surrounding surface. Once dry, sand the filler to create a smooth transition.
- Wood stain: If necessary, apply a wood stain to match the filler’s color to the surrounding wood. Allow the stain to dry completely before applying a sealant or topcoat.
- Finish coat: Apply a wood finish, such as polyurethane, over the repaired area to seal it and protect it from further damage.
Expert Tips for Flawless Repairs
While these methods are effective, here are a couple of expert tips to ensure the best results:
- Test a small area: Before using any cleaning solution, wood filler, or finish on the entire floor, test it on a small, inconspicuous area to make sure it doesn’t cause any discoloration or damage.
- Be patient: Repairing scratches takes time. Don’t rush the process, and allow each step to dry completely before moving on to the next.
Preventing Future Scratches
Once you’ve successfully removed your scratches, take steps to prevent them from reappearing:
- Use felt pads on furniture legs: This prevents furniture from dragging across the floor, reducing the risk of scratches.
- Keep pet nails trimmed: Sharp pet nails can wreak havoc on your floors. Regularly trim your pets’ nails to minimize scratching.
- Use floor mats: Place mats in high-traffic areas to help protect your floors from dirt, grit, and scratches.
How To Remove Scratches From Wood Floor
Conclusion
Now, you have the knowledge and techniques to tackle scratches on your wood floors like a pro! By following these steps, you can breathe new life into your beloved floors, regaining their pristine appearance. Remember, patience and a methodical approach are key to achieving a seamless repair. So, grab your tools, and let’s get those scratches gone!


