Have you ever dreamed of transforming your cold, hard concrete floors into a warm and inviting space? Maybe you envision a gorgeous kitchen with elegant wood-look vinyl planks, or a cozy living room with the comforting touch of stone-inspired tiles. The good news is, it’s easier than you might think! Installing vinyl plank flooring on concrete is a DIY project that can completely overhaul your home’s aesthetic without breaking the bank.

Image: mromavolley.com
Let’s dive into the world of vinyl planks and explore how you can achieve this flooring transformation yourself. This comprehensive guide will walk you through the essential steps, tips, and tricks to ensure a successful and beautiful installation, turning your concrete floors into a haven you’ll love to spend time in.
Preparing for Success: Getting Ready for Your Vinyl Plank Flooring Installation
Before you dive headfirst into the exciting world of vinyl plank flooring, there are a few essential preparations to make. Think of them as laying a strong foundation for a successful and long-lasting installation.
1. The Leveling Game: Assessing Your Concrete Subfloor
The first step is to assess the condition of your concrete subfloor. This is crucial because vinyl plank flooring needs a level and smooth surface to perform its best. A level surface prevents unevenness or buckling in the future.
Here’s how to check the level of your concrete:
- Use a level: Place a level across your concrete floor in different directions. If the bubble stays centered, you’re good to go! If the bubble leans, you’ll need to address the unevenness.
- Look for any dips or bumps: Keep an eye out for any significant dips or bumps in the concrete.
2. Smoothing Things Out: Filling Cracks and Gaps
Now that you’ve assessed the level of your concrete, it’s time to address any imperfections. Cracks, gaps, and unevenness can cause problems with your vinyl plank flooring, so it’s crucial to smooth things out:
- Filling cracks and gaps: Use a high-quality concrete patching compound to fill any cracks or gaps in your subfloor. Make sure to let the compound fully dry before moving on.
- Sanding down bumps: If you have bumps on your concrete that are too large for patching compound, you can sand them down using a coarse sandpaper.
- Cleaning your subfloor: Once you’ve addressed any imperfections, thoroughly clean your concrete subfloor. This will remove any dirt, debris, or leftover patching compound.

Image: cinvex.us
3. The Moisture Barrier: Protecting Your Flooring Investment
Water and vinyl plank flooring are not the best of friends. To protect your flooring, it’s important to install a moisture barrier:
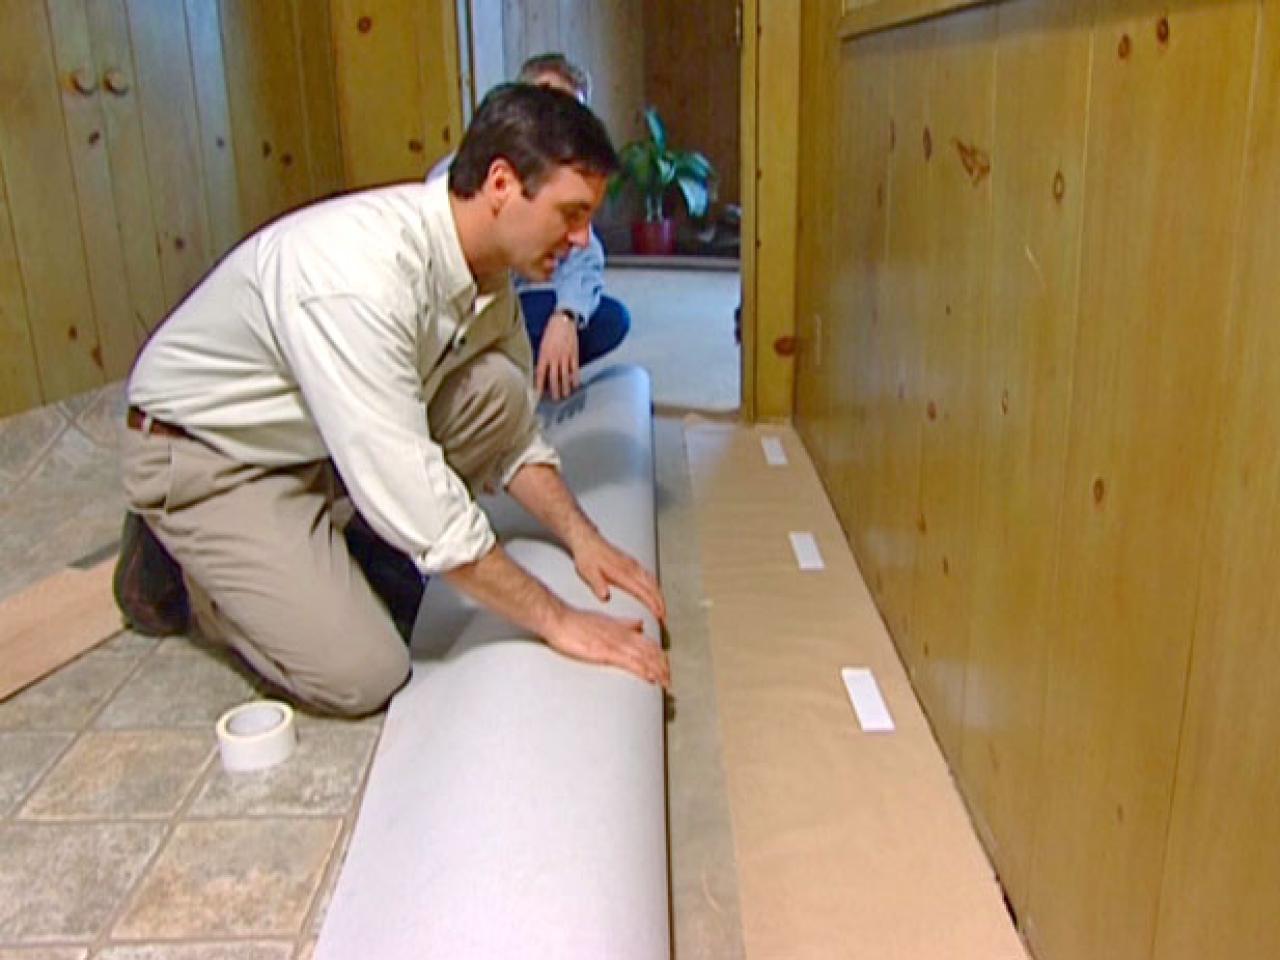
- Vapor barrier: This is a special plastic sheet that’s laid down on the concrete subfloor to prevent moisture from seeping up from below.
- Proper installation: Ensure the vapor barrier is properly overlapped and taped at the seams to create a secure seal.
Choosing the Perfect Vinyl Plank Flooring: A Style for Every Home
Now that your concrete subfloor is prepped, it’s time to let your creative juices flow and select the perfect vinyl plank flooring for your home. You have a wide range of choices, from classic wood-look planks to sleek stone-inspired options, allowing you to personalize your space to reflect your unique style.
1. Vinyl Plank Flooring Types: Exploring the Options
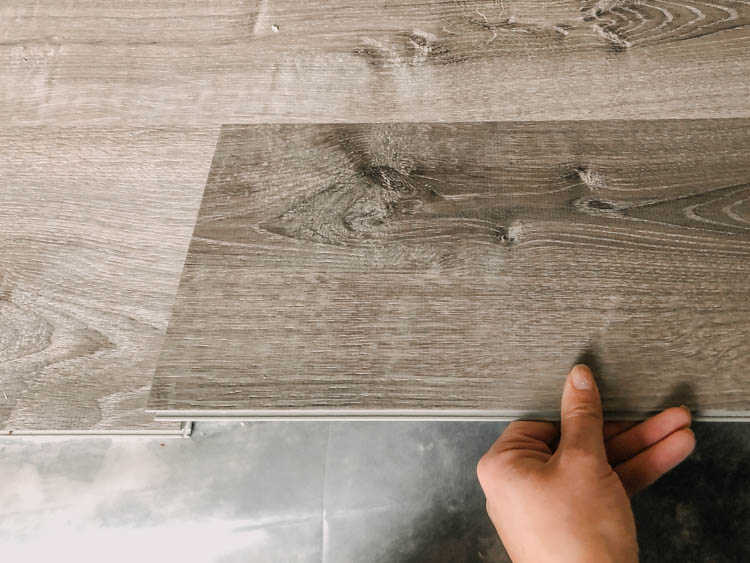
- Click-lock vinyl plank flooring: This type of flooring features a simple click-lock system that makes installation a breeze. Simply click the planks together and you’re done!
- Glue-down vinyl plank flooring: As the name suggests, this type of flooring is installed using a special adhesive.
- Luxury vinyl plank flooring: Known for its durability and realistic wood-look designs, luxury vinyl plank flooring is a high-quality option that can elevate the look of your home.
2. Finding Your Match: Choosing the Right Color, Style, and Texture
- Color: Consider the overall aesthetics of your home and choose a color scheme that complements your existing furniture, walls, and décor.
- Style: Select a style that suits your taste, whether it’s classic wood, rustic barnwood, or modern stone.
- Texture: Vinyl plank flooring comes in a variety of textures, from smooth and sleek to rough and rustic.
Laying Down the Foundation: Getting Your Vinyl Plank Flooring Project Started
With your concrete subfloor prepped and your vinyl plank flooring chosen, it’s time to get started. The following steps will guide you through the process of installing your vinyl plank flooring like a pro.
1. Starting Your Installation: The First Plank
When installing your vinyl plank flooring, it’s crucial to choose the right starting point. Here’s what you need to know:
- Start in a corner: Begin laying down your planks in a corner of the room.
- Leave expansion gaps: It’s important to leave expansion gaps between your vinyl plank flooring and the walls, This allows the flooring to expand and contract with changes in temperature.
2. Securing Your Planks: Installing Vinyl Plank Flooring
- Click-lock system: If you’re using click-lock vinyl plank flooring, simply click the planks together.
- Glue-down vinyl plank flooring: If you’re using glue-down flooring, apply a thin layer of adhesive to the back of each plank and press it down onto the concrete subfloor.
3. Working Your Way Across the Room: Efficient Vinyl Plank Installation
Once you’ve installed the first row of vinyl plank flooring, continue working your way across the room. Always follow the manufacturer’s instructions for installation, and use a tapping block to tap the planks together.
4. Cutting Planks for Perfect Fit: Achieving a Seamless Look
- Measure twice, cut once! Measure each section of flooring carefully before cutting.
- Use a sharp utility knife: This will help you make clean, precise cuts.
- Work with the grain: When cutting your planks, always work with the grain to prevent splintering.
5. Completing Your Installation: Finishing Touches
As you approach the end of your installation, you’ll likely need to cut some planks to fit. Be sure to measure carefully and make clean cuts.
Maintaining Your Vinyl Plank Flooring: A Guide for Lasting Beauty
With your vinyl plank flooring installed and ready to enjoy, it’s essential to know how to maintain its beauty. This section will guide you through the basic steps of keeping your floors looking their best.
1. Sweep Regularly: Removing Dust and Debris
Regular sweeping will help remove dust, dirt, and debris. A soft-bristled broom is ideal.
2. Mop When Needed: Gentle Cleaning
For deeper cleaning, use a mop with a mild cleaning solution and warm water. Avoid harsh chemicals that can damage your vinyl plank flooring.
3. Protect Your Flooring: Preventing Scratches and Scuffs
- Doormats: Place doormats at entryways to help trap dirt and gravel, protecting your vinyl plank flooring from scratches.
- Furniture pads: Use furniture pads on the legs of your furniture to prevent scratches and indentations.
4. Addressing Spills: Acting Quickly
- Clean spills promptly: Spills can damage your vinyl plank flooring, so clean them up as quickly as possible.
- Use a soft cloth: Use a soft cloth to wipe away spills and avoid abrasive materials that can scratch the surface.
5. Professional Cleaning: An occasional deep clean
For optimal cleaning, consider having your vinyl plank flooring professionally cleaned once a year.
Expert Insights: Tips from the Pros
- Plan your layout: Before you begin installing, take some time to plan the layout of your vinyl plank flooring. This will help you avoid awkward cuts and ensure a seamless look.
- Use a tapping block: A tapping block will help you secure the planks together and create a smooth, even installation.
- Avoid overdoing it with the adhesive: If you’re using glue-down vinyl plank flooring, avoid applying too much adhesive. This can make installation difficult and can cause buckling in the flooring.
How To Install Vinyl Plank Flooring On Concrete
Transforming Your Concrete Floors: A Final Thought
With this comprehensive guide, you’re ready to tackle the exciting project of installing vinyl plank flooring on concrete. Remember, patience and meticulous care will go a long way in achieving the beautiful and functional space you envision. Let the transformation of your concrete floors begin!


