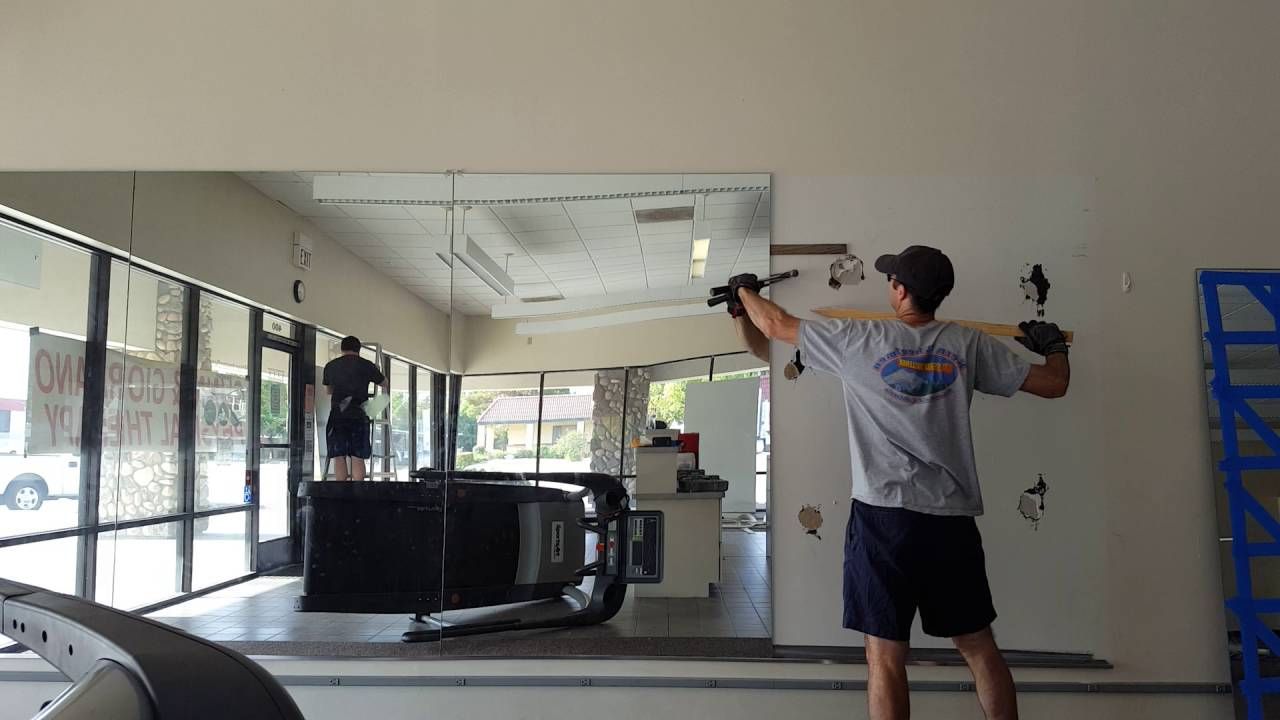
Ever felt like your living room was turned into a hall of mirrors, with multiple reflections bouncing off your floor-to-ceiling masterpiece? Maybe the sleek, modern look you envisioned has started to feel overwhelming or you’re embarking on a new design direction. Whatever your reason, removing floor-to-ceiling mirrors can be a daunting task, especially if you’re tackling it for the first time. But fear not! With the right strategy and a bit of elbow grease, you can reclaim your walls and create a fresh new space.

Image: www.bernardbeneito.com
This comprehensive guide will walk you through the process of removing floor-to-ceiling mirrors from your walls, providing tips, techniques, and safety precautions to ensure a smooth and successful project. From understanding the different types of mirror installations to tackling sticky situations like adhesive remnants, we’ll equip you with the knowledge you need to conquer this home improvement project confidently.
Assessing the Situation: Understanding Your Mirror Installation
Before you dive into the removal process, it’s crucial to assess the specific type of installation you’re dealing with. This will determine the tools, techniques, and potential challenges you might encounter.
1. Adhesive Installation: A Common Practice
Floor-to-ceiling mirrors are often installed using heavy-duty adhesives. This method is favored for its simplicity and ease of application, often seen in modern homes and commercial spaces. To determine if your mirror is adhesive-mounted, look for telltale signs such as:
- Absence of screws or nails.
- A smooth, seamless surface around the mirror edges.
- A slight give when pressure is applied gently to the mirror.
2. Frame and Mounting: A More Secure Option
Another approach involves a frame with built-in mounting points. This method offers greater stability and is best suited for larger, heavier mirrors. Some key indicators of a framed mirror installation include:
- Visible screws or nails along the perimeter.
- A distinct frame or border around the mirror.
- A rigid, fixed position with no noticeable movement.

Image: homesfeed.com
Gathering Your Tools: Essential Equipment for Mirror Removal
Before embarking on the removal process, gather the necessary tools to ensure a smooth and efficient operation.
- Rubber mallet: Used to apply controlled force without damaging the mirror.
- Putty knife: Essential for breaking the adhesive bond and prying away the mirror carefully.
- Heavy-duty scraper: Removes stubborn adhesive residue and cleans the surface.
- Utility knife: For cutting through adhesive or making precise cuts if necessary.
- Gloves: Protect your hands from sharp edges, adhesive, and debris.
- Safety glasses: Safeguard your eyes from flying debris.
- Dust mask: Essential for preventing inhalation of dust and adhesive particles.
- Trash bags or containers: For disposing of mirror shards, adhesive, and other debris properly.
Step-by-Step Guide: Removing Your Floor-to-Ceiling Mirrors
Now that you have identified your mirror’s installation type and have the necessary tools, it’s time to remove the mirror safely and effectively.
1. Preparing the Area: Safety First
Start by clearing the area around the mirror, moving furniture and belongings away. This will give you ample space to work and minimize the risk of damage or injury. Also, consider placing a drop cloth underneath the mirror to collect any debris.
2. Identifying Mounting Points: Locate the Fastenings
For framed mirrors, locate the screws or nails that hold the frame to the wall. If your mirror is adhesive-mounted, you may need to use a putty knife or scraper to carefully pry the edges of the mirror away from the wall to identify the adhesive bond.
3. Removing the Mirror: A Delicate Process
For framed mirrors, start by carefully removing the screws or nails that hold the frame to the wall. Work slowly and avoid excessive force to prevent damage. Once the screws or nails are removed, gently detach the mirror frame from the wall. For adhesive-mounted mirrors, use a putty knife or scraper to carefully break the adhesive seal. Starting at one corner, gently pry the mirror away from the wall, working your way around the perimeter. Be aware of the potential for glass shards when applying force. Remember to remove the mirror in small sections, carefully working your way around the perimeter, making sure the glass doesn’t shatter during the process.
4. Removing Adhesive Residue: A Clean Slate
Once the mirror is removed, any adhesive residue left behind should be cleaned and removed. Use a heavy-duty scraper or putty knife to loosen the adhesive. Apply a suitable adhesive remover following manufacturer instructions, and wipe the surface clean with a damp cloth. For stubborn adhesive residue, you might need to use a combination of scraper, remover, and patience.
5. Preparing for the Next Step: Wall Repair and Refinishing
After removing the mirror and cleaning the surface, you will likely need to repair and refinish your walls. If there are any holes or damage caused by screws, nails, or the adhesive process, you can use spackle or patching compound to fill them. Once the patching compound is dry, sand the surface smooth and repaint or refinish the wall to match the surrounding area.
Beyond the Mirror: The Joy of Design Exploration
Removing your floor-to-ceiling mirror is not just about clearing a wall, it’s a chance to open a doorway to new design possibilities. Embrace the blank canvas that awaits! Consider these questions as you embark on your design journey:
- What kind of feel do you want to create in your space?
- What colors, patterns, and textures will complement your existing decor?
- Are you looking for a dramatic, bold statement, or a subtle, elegant touch?
Making the Most of Your Design Choices: Mirror Removal Inspiration
Here are a few creative ways to reimagine your wall space after removing the mirror:
- Embrace a gallery wall: Transform the space into a captivating showcase of your favorite artwork, photographs, or even framed fabrics.
- Create a statement backdrop: Utilize a bold wallpaper, textured paint, or even a decorative mural to add a touch of personality and depth to your space.
- Add pops of greenery: Bring life and vibrancy to your wall with a collection of plants, making the space feel fresh and inviting.
- Integrate functional elements: Consider adding shelves, wall-mounted organizers, or even a cozy reading nook to create a multi-functional and aesthetically pleasing space.
- Embrace minimalism: Opt for a clean and minimalist approach by leaving the wall bare, allowing the other elements in the room to take center stage.
Remove Floor To Ceiling Mirrors From Wall
https://youtube.com/watch?v=eF5shoRfu3c
Conclusion: Revitalizing Your Space, One Mirror at a Time
Removing floor-to-ceiling mirrors is a rewarding project that can significantly transform your space. By carefully planning, preparing, and using the right techniques, you can create a clean and safe environment for yourself and your home. Embrace the possibilities that lie ahead beyond the mirror, and create a space that reflects your unique style and personality. Remember to take your time, prioritize safety, and enjoy the process of revitalizing your home one wall at a time. And when you’re ready for your next home renovation project, don’t hesitate to explore the vast array of resources and inspiration available online.


