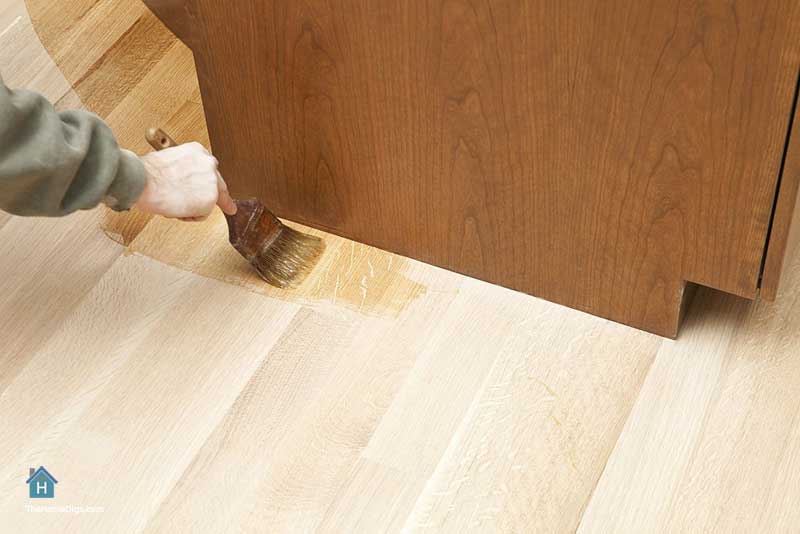
Imagine this: you’ve painstakingly sanded your wood floors, painstakingly restored their natural beauty, and you’re ready for the final touch—a gleaming coat of polyurethane. But as you apply the finish, tiny bubbles start to appear, marring your hard work. Frustration sets in, and you wonder what went wrong. Fear not, aspiring wood floor refinishers! This guide will equip you with the knowledge and techniques to avoid bubbles and achieve a flawless polyurethane finish.

Image: www.thehomedigs.com
Applying polyurethane to wood floors is a meticulous process that demands attention to detail. Bubbles, those pesky air pockets that disrupt the smooth, glassy surface you desire, often result from improper preparation, application techniques, or environmental factors. This article will delve into the intricacies of applying polyurethane, addressing the root causes of bubbles and offering proven solutions to achieve a bubble-free masterpiece.
Start with Solid Preparation: The Foundation for a Smooth Finish
1. The Crucial Role of Cleanliness
Before even thinking about polyurethane, make sure your wood floors are clean and free of dust, debris, and anything else that could interfere with the finish’s adhesion. A good cleaning with a damp mop and a mild cleaner will remove any dirt and grime, but don’t forget to let the floor dry completely before proceeding.
2. Sanding: Essential for a Smooth Surface
Sanding is critical for creating a smooth surface for the polyurethane to adhere to. This step helps to even out any imperfections in the wood and gives the finish something to grip onto. Remember to use different grit sandpaper to achieve a progressively finer finish. Start with coarse sandpaper (80-grit) to remove any scratches or rough spots, followed by medium-grit (120-grit), and finally, fine-grit (220-grit) for a perfectly smooth surface.

Image: www.pinterest.com
3. Tack Cloths: Trapping the Last of the Dust
After sanding, your wood floors will have a fine layer of dust that can cause bubbles in your finish if left undisturbed. So, before you apply anything, use a tack cloth to wipe away this dust. A tack cloth is a sticky material that will pick up even the tiniest dust particles, ensuring a clean and smooth surface for your polyurethane.
The Art of Application: Mastering the Techniques
1. Temperature Matters: The Goldilocks Zone for Polyurethane
The temperature of your workshop, and your polyurethane itself, play a significant role in preventing bubbles. Both should be at a comfortable room temperature—around 70°F (21°C). Too hot, and the polyurethane dries too quickly, trapping air bubbles. Too cold, and the polyurethane dries too slowly, increasing the likelihood of dust settling in and causing bubbles. Don’t rush: patience is key!
2. Thin Coats: Avoid Overapplication
Thin coats are your best friend when it comes to preventing bubbles. Instead of trying to cover the entire floor in one thick layer, apply multiple thin coats, allowing each coat to dry completely before applying the next. This allows the polyurethane to cure properly without trapping air pockets. Use a brush with soft bristles for even application and minimize the amount of polyurethane on the brush.
3. The Power of Back and Forth: Applying the Finish
The way you apply polyurethane matters. Use long, smooth strokes in one direction, then overlap the previous stroke by about half its width. Avoid going back and forth in the same area, as this can trap air. Work systematically, covering the floor section by section. Be mindful of the edges and corners, making sure the finish is applied evenly across the entire surface.
Environmental Factors: Keeping the Air Still
1. The Enemy of Bubbles: Drafts
Drafts, those pesky air currents, can disrupt the drying process and lead to bubbles. Make sure your work area is free of any drafts from windows, doors, or fans. Close all windows and doors, and turn off any fans until the polyurethane has dried completely. Consider using a space heater to keep the room temperature consistent.
2. Humidity: A Potential Troublemaker
Humidity, the amount of moisture in the air, can also contribute to bubbles. If the humidity is high, the polyurethane will dry more slowly, increasing the likelihood of dust settling in and causing bubbles. Aim for a relative humidity of around 50%. You can use a dehumidifier to lower the humidity in your workshop if necessary.
Dealing with the Troublesome Bubbles: Making the Best of a Less Than Ideal Situation
Despite your best efforts, bubbles may still appear. Don’t despair! It’s not the end of the world.
Option 1: Popping and Resanding
If the bubbles are small, you can try to pop them with a fine-grit sandpaper. Once the polyurethane is dry, lightly sand the surface to smooth out the bubbles. Then, apply a thin coat of polyurethane over the sanded area.
Option 2: Stripping and Applying Anew
If the bubbles are numerous or large, you may need to strip the polyurethane off and start over. Use a polyurethane stripper to remove the finish, follow the directions carefully, and then sand the surface again. Repeat the application process with the techniques and tips you’ve learned.
How To Apply Polyurethane To Wood Floors Without Bubbles
Conclusion: Achieving the Perfect Polyurethane Finish
Applying polyurethane to wood floors without bubbles requires meticulous preparation and application techniques. By following these guidelines, including cleaning, sanding, using the right temperature, applying thin coats, and eliminating drafts and excessive humidity, you’ll significantly reduce the risk of pesky bubbles. Remember, patience and attention to detail are key to achieving a smooth, flawless finish that you can be proud of. This article has provided a comprehensive approach to preventing and dealing with bubbles, giving you the confidence to tackle your next wood floor project with a winning outcome.


