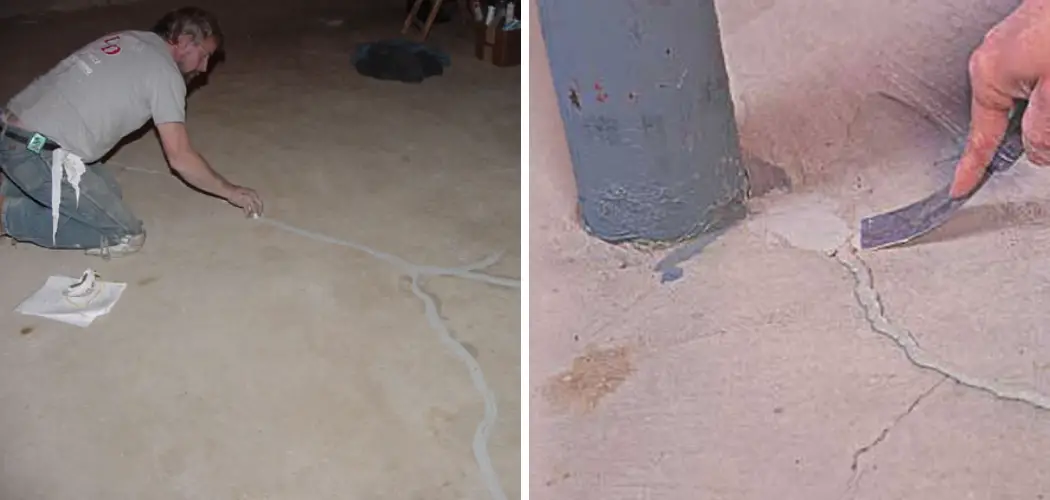
Imagine waking up one morning, the morning sun streaming through your basement windows, revealing a beautiful space perfectly suited for a home office, playroom, or cozy reading nook. But then you see it: a crack snaking across the concrete floor, a stark reminder of the invisible threat lurking beneath your home: radon.
Image: www.stlradon.com
Radon, a radioactive gas, can seep up from the ground and into your home through cracks in your basement floor, potentially leading to serious health risks. While radon is a natural element, sealing those cracks is a crucial step in protecting your family. This comprehensive guide will walk you through the process of sealing these cracks effectively, empowering you to create a safe and healthy environment in your basement.
Understanding Radon: The Invisible Threat
Radon is a colorless, odorless, and tasteless gas that can be found in soil and rocks. It breaks down from uranium, a naturally occurring element found in the earth’s crust. As radon travels up from the ground, it can enter homes through cracks in the foundation, gaps in walls, and other openings. Once inside, it can accumulate to harmful levels, posing a serious health risk to your family.
The Environmental Protection Agency (EPA) estimates that radon is the second leading cause of lung cancer in the United States, accounting for an estimated 21,000 lung cancer deaths annually. That’s why understanding how to prevent and mitigate radon exposure is vital for every homeowner.
Identifying Radon Entry Points in Your Basement
Before you can seal up those cracks, you need to find them. Radon can seep into your home through numerous pathways, but your basement floor is often a prime entry point. Here’s a simple guide:
- Visually inspect your basement floor: Look for cracks, gaps, and holes in the concrete.
- Feel for drafts: Run your hand along the floor and walls, checking for any areas where you can feel cool air coming in.
- Use a radon test kit: These inexpensive kits will determine if you have high radon levels, which can help you pinpoint the sources of entry.
Choosing the Right Sealing Material: A Guide to Effective Solutions
Once you’ve identified the cracks, you need to choose the right sealant to effectively stop radon from entering your home. There are several options available, each with its own strengths and weaknesses:
- Silicone caulk: This is a commonly used sealant for sealing small cracks. It’s easy to apply and can create a strong seal. However, it’s not as resistant to moisture and can degrade over time.
- Epoxy caulk: This is a more durable option that is often used for larger cracks or areas of high moisture. It’s also a good choice for sealing concrete to prevent radon from entering.
- Hydraulic cement: This is a strong and resilient sealant that is great for filling larger gaps or fixing cracks in concrete. Be sure to follow the manufacturer’s instructions carefully for proper mixing and application.
- Radon-blocking paint: This is a specialized paint that can create a barrier against radon. It’s typically applied over a sealant to provide an extra layer of protection.

Image: www.basementnut.com
Sealing Cracks: A Step-by-Step Guide to Peace of Mind
Here’s a comprehensive step-by-step guide to sealing those cracks, ensuring a safe and healthy environment in your basement:
- Prepare the area: Clean the area around the cracks with a stiff brush or vacuum to remove any debris or loose material. Ensure the cracks you’re about to seal are dry.
- Widen the cracks: For large cracks that need a deeper seal, use a chisel and hammer to widen them slightly.
- Apply sealant: Apply the chosen sealant to the cracks, ensuring a complete fill. Use a putty knife or caulking gun to smooth out the sealant and ensure a strong bond.
- Allow time for curing: Allow the sealant to fully cure as per the manufacturer’s instructions.
- Re-test radon levels: After sealing the cracks, it’s essential to retest for radon. If the levels are still high, you may need to take additional steps, such as installing a radon mitigation system.
Expert Insights: Beyond Basic Sealing
While sealing cracks is a crucial step, it’s not always the sole solution. Consult a professional radon mitigation expert, who can perform a thorough inspection of your basement and provide customized advice. Here are some valuable tips:
- Addressing significant gaps and openings: Beyond small cracks, your basement might have larger gaps around windows, doors, and utility pipes that need proper sealing. A professional can help you address these larger openings effectively.
- Installing a radon mitigation system: If testing reveals high radon levels, even after sealing cracks, consider installing a radon mitigation system. These systems use a fan to vent radon gas from under your home, significantly reducing its concentration inside.
How To Seal Cracks In Basement Floor For Radon
A Safer and Healthier Basement: Your Family Deserves It
Sealing cracks in your basement floor is a simple yet effective step to protect your family from the dangers of radon gas. By understanding how to identify entry points, choose the right sealant, and follow thorough sealing procedures, you can create a safer and healthier environment in your basement. Remember to retest radon levels after sealing, and if necessary, consult with a radon mitigation expert to discuss further steps. Protect your family and enjoy the peace of mind of a healthy basement!


