
Picture this: you’re strolling through your beautifully finished living room, enjoying a cup of coffee, when you notice a stray staple lodged in your hardwood floor. A small annoyance, right? While it might not seem like a major issue, removing a staple from hardwood floors without damaging the surface requires a bit more finesse than just yanking it out. That’s why this guide is dedicated to helping you conquer this common household problem with confidence.
")
Image: craftivitydesigns.com
Hardwood flooring is a beautiful and durable investment, adding elegance and value to your home. But accidental staples from DIY projects, furniture, or even dropped items can mar the pristine finish. The key is to remove any staple without leaving a trace, ensuring your floors remain as beautiful as the day they were installed. Let’s dive into the best approach to tackle this seemingly simple yet sometimes tricky issue.
Understanding the Challenges: Why Pulling Staples from Hardwood Floors Can Be Tricky
Hardwood floors are engineered for durability, with a top layer of protective finish that shields the wood from scratches, stains, and wear and tear. But the very same finish that protects your floors can also make removing staples a bit more challenging.
- The Finish: Most hardwood floors are coated with a sealant, like polyurethane or wax. This finish adds a protective layer that can be harder than the staple itself. Pulling directly can leave behind a dent or scratch.
- The Metal: Staples are often made of steel, and even a small staple can leave a significant mark if removed without proper technique. The metal can penetrate the sealant and dent the underlying wood.
- The Staple’s Orientation: Depending on how the staple was hammered in, the angle and depth of the staple can make it difficult to remove without damaging the surrounding area.
Best Way to Remove Staples From Hardwood Floors
While there are a few different methods for removing staples from hardwood floors, the most effective and least damaging approach involves a combination of careful techniques. Here’s what you need and how to do it:
Tools You’ll Need:
- Needle-Nose Pliers: These versatile pliers provide a secure grip on the staple head, allowing you to gently pull it out without slipping.
- Hammer: A hammer (preferably a claw hammer) is essential for gently tapping the staple flush with the floor, making extraction easier.
- Wood Putty/Filler: After removing the staple, wood filler or putty can be used to repair any minor dents or scratches for a flawless finish.
- Sandpaper (fine grit): To smooth out any rough edges or inconsistencies after using putty, you may need fine-grit sandpaper.
- Finishing Touches: Depending on your floor’s finish, you may need to apply a touch of wood stain or floor polish to match the original color.
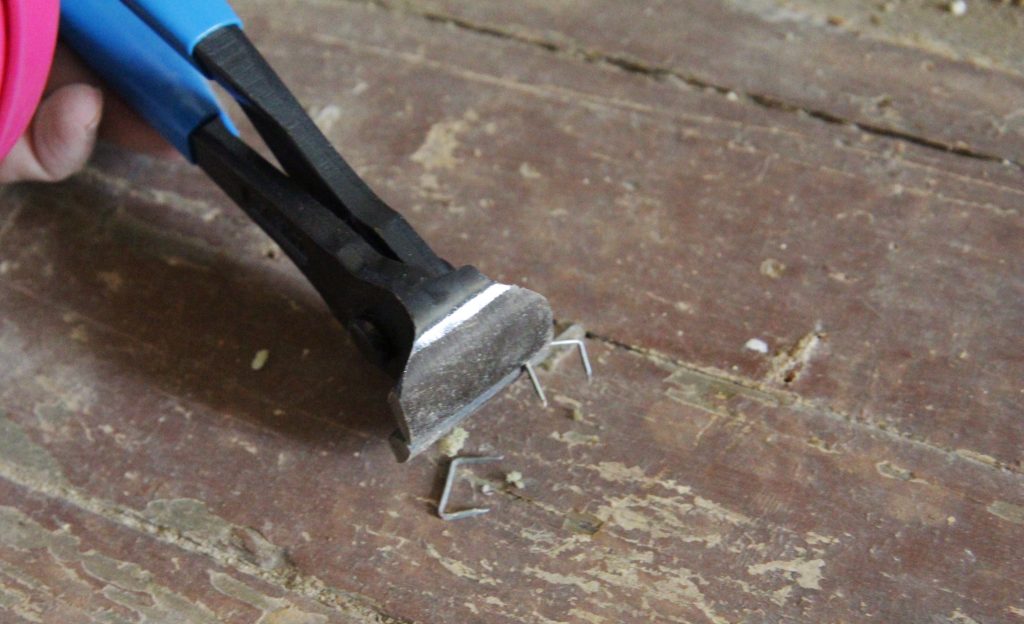
Image: www.stkittsvilla.com
Step-by-Step Instructions:
- Secure the Staple: Using a pair of needle-nose pliers, firmly grip the staple head. Make sure you have a good grip so the staple doesn’t slip while you pull.
- Gently Pull: Slowly pull the staple upward, applying even pressure. Don’t yank or jerk the staple, as this could contribute to surface damage.
- Hammer Assistance: If the staple is difficult to pull out, use a hammer to tap the staple head gently, driving it further into the wood. This will make it easier to get a grip with the pliers.
- Final Removal: With the staple partially embedded, use pliers to pull the remaining portion out carefully. Remember, the goal is to minimize damage to the floor, so avoid pulling with aggressive force.
- Repairing Minor Discoloration: Once the staple is removed, you may notice a small imperfection in the floor’s finish. To fix this, use wood putty or filler, applying it over the dent and smoothing it out with a putty knife.
- Sanding (Optional): After the filler has dried, use fine-grit sandpaper to smooth out any uneven areas. This step is crucial for ensuring a seamless finish.
- Finishing Touches: You may need to apply a touch of wood stain or floor polish to the repaired area, blending it with the original floor finish.
Expert Insights: Tips From Experienced Wood Floor Professionals
Experienced wood floor professionals offer these valuable insights:
- Prevention is Key: To avoid accidental staples in your hardwood floors, be mindful of your DIY projects, consider using alternative fasteners like brads or finish nails, and always use a hammer mat when working near your flooring.
- Don’t Overdo It: Avoid excessive force when pulling staples. If you feel resistance, re-evaluate your approach rather than forcing the staple out.
- Professional Expertise: For stubborn staples or significant damage, it’s wise to consult a professional wood floor repair specialist.
Best Way To Pull Staples Out Of Hardwood Floors
Conclusion: A Smooth Finish
Removing a staple from your hardwood floors might seem like a small feat, but it requires a bit of care and patience to ensure your floors remain flawless. By following these tips and using the right approach, you can easily remove staples from your hardwood floors without leaving a mark. Remember, preventative measures and professional advice are essential for preserving the beauty and longevity of your investment.
Share your success stories and challenges with us in the comments section below! We’d love to hear from you and learn about your experiences!


